
Last updated November 15, 2026
 AC repair
 Furnace & heating
 Heat pumps
 Ductless mini splits
 Carrier
 Trane
 Goodman
Seasonal tune-up and full diagnostic on your Carrier, Trane, or Goodman system - readings shown to you before any repair is proposed
Diagnosis first, numbers second - you approve the repair price before a single part goes in.
Get your free estimateAC Installation Troubleshooting in Cape Coral: Common Problems and How to Fix Them
Here’s the part nobody tells you when you sign the install contract: a brand-new air conditioner can be installed wrong and still run. It will hum, it will blow air, and it will look perfectly normal for a while. Then the signs show up. Rooms that don’t reach the thermostat setting. A system that runs for eight minutes, stops, and starts again all afternoon. Water pooling near the air handler. In Cape Coral, where the system runs nearly every day of the year, those small installation errors surface faster and cost more than they would in a cooler climate. This guide walks you through the most common post-installation failures we diagnose, how to tell an install mistake from a genuine manufacturer defect, and how to document problems so you get the fix you’re entitled to.
Quick Answer
A new AC that isn’t cooling properly after installation in Cape Coral is most often the result of an installation error, not a defective unit. The three we see most: incorrect refrigerant charge, an oversized system that short-cycles in high humidity, and ductwork or thermostat wiring that wasn’t connected or sealed during the install. These problems are nearly always covered under the installer’s workmanship warranty or the manufacturer’s labor allowance, which is why documenting the symptoms in writing matters. Get a second diagnostic if your installer dismisses symptoms that don’t match the system’s rated performance.
Styles & brands we work with
- AC repair
- Furnace & heating
- Heat pumps
- Ductless mini splits
- Carrier
- Trane
- Goodman
Table of Contents
- Refrigerant Charge Problems: Install Error vs. Factory Defect
- Short-Cycling in Cape Coral Humidity: The Oversizing Problem
- Ductwork Connection Failures After Installation
- Thermostat Wiring Mistakes That Mimic Equipment Failure
- Condensate and Drain Line Problems in Southwest Florida
- Airflow Imbalances and Register Placement
- How to Document Problems and Escalate Effectively
- How to Choose an Installer Who Gets It Right the First Time
Refrigerant Charge Problems: Install Error vs. Factory Defect
An improperly charged system is the single most common installation error we find on new installs in Cape Coral. The unit isn’t broken. It was either under-charged, over-charged, or charged without weighing in the correct line length for the run between the condenser and the air handler. When the charge is wrong, the system can’t remove heat at its rated capacity. It runs longer, cools less, drives up your electric bill, and in a region where the cooling season lasts all year, that inefficiency compounds month after month.
Refrigerant isn’t something you add as a top-up. A properly installed system is charged by weight to an exact specification from the manufacturer, not by watching gauge pressures until they “look right.” If your installer charged by pressure alone, or added refrigerant without knowing the factory charge and the line-set length, there’s a good chance the system is off.
How to Tell an Install Error from a Factory Defect
This distinction matters because the remedy is different. An install error is the contractor’s responsibility under their workmanship warranty. A factory defect falls under the manufacturer’s parts warranty, which typically covers the part but may not cover the labor to diagnose or replace it. Here’s how the two usually present:
- Install error signs: The system never cooled correctly from day one. Pressures don’t match the ambient temperature and load. Suction line isn’t cold and sweating. Superheat or subcool readings are out of spec, and no log exists showing the installer verified them at commissioning.
- Factory defect signs: The system worked correctly for weeks or months, then a leak developed at a factory braze joint, a compressor failed with no prior symptoms, or a TXV stuck. There’s a documented commissioning record showing correct charge at start-up.
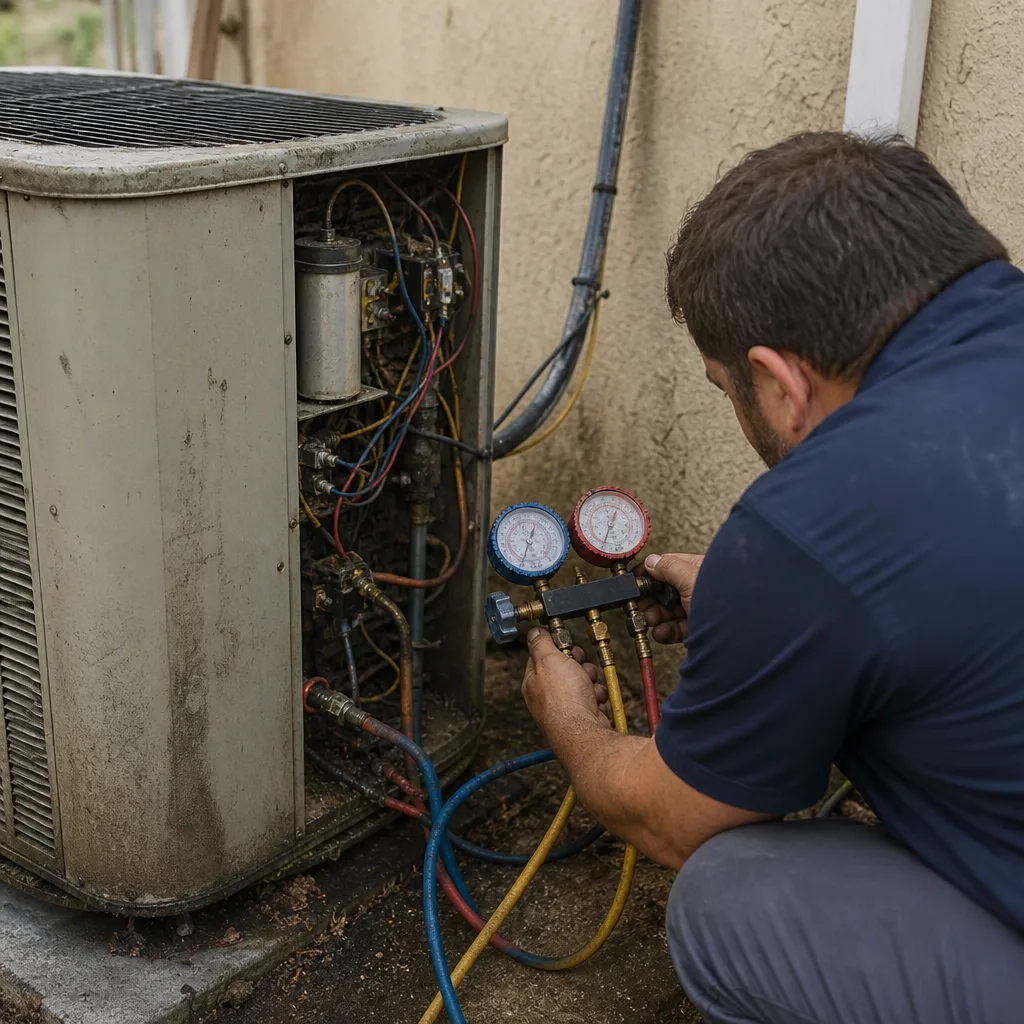
The commissioning record is the key piece of evidence. A reputable installer leaves a start-up sheet with the charge weight, the line-set length, pressures, superheat, subcool, and static pressure readings. If you don’t have that sheet, ask for it. The absence of a start-up record is itself a red flag. Our technicians have up to experience working with whatever system is in the home, and the first thing we ask for on a new-install problem call is that commissioning data.
Short-Cycling in Cape Coral Humidity: The Oversizing Problem
If your new system runs in short bursts, never seems to stay on long enough to actually pull down the humidity, and leaves the house feeling clammy even when the thermostat says 74, there’s a strong chance the system is oversized. That’s not a defect. It’s a sizing mistake that happens before the equipment is ever delivered.
In Cape Coral, humidity is the whole game. A properly sized system runs long enough to do two jobs: cool the air and pull moisture out of it. An oversized system blasts cold air quickly, satisfies the thermostat, and shuts off before it has removed meaningful humidity. The house feels cold and sticky at the same time, and the system cycles on and off 10 to 20 times more per day than it should. The wear on the compressor matters, but the comfort and moisture damage inside the house matter more.
What Recourse Do You Have When a Contractor Sizes Wrong?
Most of the time, oversight of a residential AC installation falls to your city or county building department. In Cape Coral, a load calculation is part of the standard permitting process for a system replacement or new install, and that calculation is what the permit is supposed to verify. If you suspect oversizing, here’s the sequence:
- Request a copy of the permit and the load calculation (Manual J) from your installer.
- Compare the calculated tonnage to the equipment actually installed. If a smaller unit was specified and a larger one was put in, you have your answer in writing.
- Ask the installer to document why the larger unit was chosen. A short answer like “we always go one size up” isn’t a load calculation, and it’s a problem.
- If the installer won’t engage, contact your local building department. A permit that specifies one size and an install of another is a code compliance issue, not just a comfort issue.
- Get a second opinion from an independent HVAC company that will run its own load calculation on the house and report back.
Oversizing is fixable, but it’s rarely cheap. Sometimes the fix is to improve the thermostat staging, adjust airflow, or add a small dehumidifier in the duct system. The right solution depends on the size of the error and the layout of the house. If you’re in the market for a replacement in the future, choosing a contractor with real AC installation experience based on load calculation rather than rule-of-thumb sizing is the difference between a system that handles Cape Coral’s humidity and one that never quite does.
Ductwork Connection Failures After Installation
Ductwork is the part of an installation most homeowners never see, and it’s where a surprising share of new-install problems live. The system itself can be perfectly charged and correctly sized, and still not deliver comfort to half the house because a duct connection came loose, wasn’t sealed, or was never properly sized for the equipment.
In Southwest Florida attics, the duct system sits in brutal heat all year. Flexible duct that was installed with loose straps, sharp bends, or unsealed joints will leak, kink, or pull apart faster here than in a cooler climate. What you feel inside the house is a room that never gets cool, higher electric bills, or odd noise from the ceiling registers when the system kicks on.
Visual and Performance Signs of a Duct Problem
- Audible whistling or rushing at the registers. Usually means static pressure is too high, which often comes from undersized ducts or a crushed flex run.
- One room that’s always hotter than the rest. An improperly balanced system, or a run that was never fully connected during install.
- Visible gaps at the plenum or trunk. If you can see daylight, feel air, or spot tape pulling away at a joint you can reach from the attic access, it wasn’t sealed correctly.
- Condensation on ceiling or registers. Often a sign that the ducts are not insulated correctly for the local climate, or that a run is sweating because it’s loose and short-cycling.
- Weaker airflow than the day the system went in. A gradual loss of airflow after install often traces to a loose flex collar or a damper stuck in the wrong position.
If you can access your attic safely, a flashlight inspection of the plenum and the first few feet of ductwork will often turn up a problem. If you can’t, a technician can measure static pressure and airflow at the registers in about 20 minutes and tell you whether the system is meeting spec. That measurement is the difference between a diagnosis and a guess. And because Cape Coral homes often have their air handlers and duct runs in the attic with limited clearance, we spend more time on duct diagnosis than most homeowners expect. It’s the quietest cause of an “AC not cooling” complaint on a new install.
Thermostat Wiring Mistakes That Mimic Equipment Failure
If your new system is behaving erratically – running the fan but not the compressor, not running at all, or cycling through modes on its own – the problem is very often the thermostat wiring rather than the equipment. It’s a small, unglamorous part of the install, and it gets rushed.
The installation guide for each thermostat specifies which wire goes on which terminal. When the wires get crossed – say the fan terminal and the compressor terminal are swapped, or a wire is loose and intermittently making contact – the system does strange things. In Cape Coral, where a homeowner will usually notice a problem because the house gets hot fast, that erratic behavior often gets reported as “the new AC is broken.” The unit is fine. The control wiring isn’t.
Common Wiring Symptoms to Watch For
- The indoor fan runs but the outdoor unit never starts. Almost always a wiring or low-voltage control issue.
- The compressor starts but the fan doesn’t, causing the coil to freeze up. This is an urgent symptom – turn the system off and call for a technician.
- The thermostat loses power intermittently, or the screen flickers or goes blank. Usually a loose low-voltage connection at the air handler.
- The system runs in heat mode when it should be cooling, or vice versa. Almost certainly wired wrong at the thermostat or air handler.
- A “C-wire fault” or similar error code on a modern thermostat. This is your clue that the common wire wasn’t connected properly.
On multi-stage or communicating systems from brands like Goodman or Daikin, wiring mistakes are more consequential because the control communication between the indoor and outdoor units has to be correct. We’ve seen thermostats swapped, replaced, and re-swapped on a new install when the actual problem was a single loose low-voltage wire at the air handler. A trained tech can trace the low-voltage circuit in a few minutes with a meter. This isn’t a homeowner repair – it involves the control board and line voltage nearby – so we recommend having it checked rather than trying to rewire it yourself.
Condensate and Drain Line Problems in Southwest Florida
An air conditioner in Cape Coral produces a lot of water. During peak summer, a typical system pulls gallons of moisture out of the air every day. All of that water has to leave the house through a drain line, and in a new install, the drain is one of the more commonly rushed pieces of the job.
The most common failure isn’t a broken part. It’s a drain line that was run with too little slope, tied into a plumbing line that can’t handle the volume, or installed without a proper trap. Sometimes the float switch inside the air handler wasn’t wired, and water overflows into the pan and out onto the ceiling or into a closet before anyone notices. In a climate where the system runs constantly, that overflow can happen in the first week of operation, not months later.
Signs Your Drain Isn’t Right
- Water stains on the ceiling or near the air handler closet.
- Water in the emergency drain pan under the unit.
- Musty smell near the air handler, which often means standing water somewhere it shouldn’t be.
- An error code or an automatic system shutdown – many modern systems are wired to shut down if the float switch trips.
- The indoor humidity stays high even while the system is running. A restricted drain line can ice the coil, which stops dehumidification.
If you find water where it shouldn’t be, turn the system off at the thermostat. The drain line on a new install is a contractor issue if it’s under a year old – the install should have included proper slope, a clean-out, and a properly wired float switch. Don’t wait to see if it stops on its own. On a hot Cape Coral afternoon, a small drip can become a large water-damage event in the time it takes to run errands.
Airflow Imbalances and Register Placement
Not every post-install comfort problem is a hardware issue. Sometimes the duct system, register placement, and return air design simply weren’t thought through. The result is one part of the house that feels great and another that feels like the AC was never installed.
Airflow balance is a design problem, and it’s a common one in Southwest Florida homes that were expanded or reworked over the years. When the duct trunk isn’t sized for the new system, or the return air isn’t large enough, the system fights itself. Static pressure climbs, airflow to some rooms drops, and the equipment wears faster because it’s running longer than it should.
What a Proper Airflow Check Looks Like
- Measure static pressure at the supply and return plenums. It should fall within the equipment manufacturer’s specification. If it doesn’t, the ductwork needs adjustment.
- Measure airflow at the registers using a flow hood or a calibrated ballometer. Each register should deliver the design CFM for its size.
- Compare airflow across the house. Rooms that are 20% below the rest usually indicate a design problem, not a register that’s simply shut too far.
- Check the filter. A filter that’s too restrictive for the system (too high a MERV rating for the return grille size) can starve the system of airflow even on a brand-new install.
- Verify the return air path. Undersized returns are common and are one of the easiest airflow fixes.
If the airflow problem was created by the installation, it’s the installer’s responsibility to correct it. If your system is a little older and you’re facing a similar complaint, our furnace repair perspective on airflow applies to AC side too: the fix is usually in the ductwork, not the equipment. In Cape Coral, where the system runs most of the year, a duct imbalance compounds month after month and shows up on the electric bill before it shows up in a room that’s too warm.
How to Document Problems and Escalate Effectively
The single most important thing you can do when a new install isn’t working is document it in writing. Verbal complaints tend to evaporate. Written complaints create a record, and in a warranty dispute, that record is often the deciding factor. Here’s the sequence we recommend:
- Log the symptoms with dates and times. Note thermostat settings, room temperatures, unusual sounds, and anything you observe. A short daily note is more effective than a long narrative written after the fact.
- Photograph what you can see. Water stains, ice on the coil line, gaps in ductwork, an error code on the thermostat screen. Photos timestamps hold up.
- Get the install paperwork organized. Contract, permit number, load calculation, equipment model and serial numbers, and the commissioning sheet. If any of these are missing, request them in writing.
- Send a written service request to the installing contractor. Email is best because it creates a record. State the symptoms, the dates, and the specific remedy you’re requesting.
- Give the installer a reasonable window to respond. If they don’t, escalate to the manufacturer’s customer service line with the model and serial number. Manufacturers care because warranty claims on their equipment reflect on them.
- Get a second opinion from an independent HVAC company. A written diagnostic report from a company with no incentive to defend the original install carries weight when you’re negotiating.
Escalation is not about being aggressive. It’s about clarity. In our experience serving Cape Coral, the installations that get resolved quickly are the ones where the homeowner has a paper trail and knows what they’re asking for. The ones that drag on for months are the ones where the whole conversation happened over the phone.
How to Choose an Installer Who Gets It Right the First Time
The best troubleshooting is the kind you never have to do. Since most of the problems in this guide trace back to installation choices, choosing the right installer up front saves you the entire headache. What you should look for is less about brand name and more about process.
- A real load calculation. Ask to see a Manual J before signing anything. If the contractor can’t show you one, they’re sizing by square footage or by gut feel.
- A commissioning sheet. A written record of refrigerant charge weight, line-set length, superheat, subcool, and static pressure. Ask to see this before the technician leaves on install day.
- Permits pulled in the homeowner’s name and pulled properly. Skip this and the install has no oversight.
- Ductwork inspected and sealed on day one. Any installer who treats the ducts as an afterthought will leave problems behind.
- Multi-brand competence. Whether your system is Carrier, Trane, Lennox, Goodman, Rheem, York, Daikin, Bryant, or American Standard, a good installer knows the brand’s specific requirements. Brands vary in charge, airflow, and control wiring – a company that only knows one or two will sometimes install a system they can’t service well later.
- Warranty terms in writing before install day. Labor warranty, parts warranty, and the process for making a claim. Ask what happens if you have a problem in the first 30 days. The answer tells you a lot.
Linden AC Repair handles Linden AC Repair installations the way we’d want them handled in our own homes: load calculation first, commissioning sheet at handoff, warranty terms in writing. We’re heating and cooling only, which means every technician we send out works on HVAC systems all day, every day, not plumbing on Monday and ducts on Friday. If you’re planning a replacement, we can walk you through what a properly documented install looks like before anything is ordered.
Common Mistakes to Avoid
- Assuming the thermostat is broken when the system is wired wrong. Buying and installing a new thermostat rarely fixes intermittent behavior, and it adds a variable to the diagnosis. Call a technician first.
- Adding refrigerant without a leak test or a charge-by-weight plan. Topping off without finding the cause is a short-term fix that delays the actual problem and can trap moisture in the system.
- Ignoring a system that short-cycles because “it still cools.” In Cape Coral’s humidity, short-cycling leaves the house clammy and accelerates compressor wear. It’s a comfort problem and a lifespan problem at the same time.
- Covering a return air grille with furniture. A blocked or undersized return starves the system of airflow, which is one of the easiest install issues to trigger from the homeowner’s side without realizing it.
- Waiting out a warranty period without documenting anything. A verbal complaint that goes unaddressed for 90 days is very likely to be unaddressed forever. Put it in writing immediately.
- Calling the manufacturer’s line before contacting the installer. The manufacturer will usually direct you back to the installer first. Build your paper trail with the installer, then escalate if you have to.
- Hiring a jack-of-all-trades for HVAC work. A general handyman can’t perform a load calculation, weigh in refrigerant to factory spec, or write a commissioning report. Your system is too expensive to trust to a divided attention.
See the difference
 Before
 After
 Before
 After
 Before
 After
When to Call a Professional
Some new-install problems are obvious and quiet, and some escalate into genuine safety concerns. Call a professional right away if you see or smell any of the following: burning or hot-plastic smell near the air handler, ice on the indoor coil or refrigerant lines, water pooling near the electrical area of the unit, the compressor repeatedly tripping the breaker, or an error code the thermostat won’t clear. Turn the system off at the thermostat and let a trained technician diagnose it. Refrigerant work, high-voltage control wiring, and gas-adjacent equipment (if you have a gas furnace combined with your AC) are not homeowner repairs and shouldn’t be treated as such. Our technicians have up to experience with new-install diagnostics, and we can rule out simple problems fast. Linden AC Repair offers free estimates in Cape Coral – call (855) 595-4793. We answer 24/7. Fast dispatch from 7am to 7pm, Sunday through Friday.
Frequently Asked Questions
Incorrect refrigerant charge is the most likely cause of a new system that isn’t cooling to its rated capacity, followed by oversizing that causes short-cycling and ductwork that wasn’t sealed correctly during install. A commissioned system should reach its rated split across the coil on day one. If your system doesn’t, something in the install wasn’t done to spec. Call (855) 595-4793 for a diagnostic – estimates are free.
The quickest test is whether the system worked correctly on day one. If it never cooled right from install, that’s an installation problem. If it worked for weeks or months and then developed a leak or failed part, that’s more likely a factory defect. The commissioning sheet makes this distinction concrete. Call (855) 595-4793 and we’ll help you read what you have.
Signs of an improper charge include weak cooling from day one, warm or room-temperature suction lines, ice on the indoor coil, higher electric bills without a change in weather, and a hissing or gurgling sound at the outdoor unit. A technician can confirm with a superheat/subcool reading in about 15 minutes. Call (855) 595-4793 for an exact quote on a diagnostic and charge evaluation.
Short-cycling in a humid climate is almost always an oversizing problem, not a thermostat problem. The system cools the air quickly, the thermostat satisfies, and the system shuts off before it has removed enough moisture to make the house feel comfortable. Ask your installer for the load calculation and compare it to the equipment installed. If the numbers don’t line up, you have grounds for a conversation with the installer or the building department. Call (855) 595-4793 for a second opinion – we can measure what the system is actually doing.
Yes. Look for audible whistling or rushing at the registers, one room that’s always cooler or warmer than the rest, visible tape pulling away at accessible duct joints, condensation on the ceiling or registers, and airflow that’s weaker than the day the system was installed. A technician can measure static pressure and airflow to confirm. Call (855) 595-4793 for a duct evaluation – estimates are free.
Put every symptom in writing, request the load calculation, permit, and commissioning sheet in writing, and give the installer a reasonable window to respond. If they don’t, escalate to the manufacturer with your model and serial numbers, and call your local building department if the permit details don’t match the equipment actually installed. A second opinion from an independent HVAC company is worth the diagnostic cost because the written report carries weight. Call (855) 595-4793 if you’d like a second opinion in Cape Coral.
The Bottom Line
A new AC that isn’t cooling right in Cape Coral usually isn’t a bad unit – it’s an installation that was rushed somewhere. Refrigerant charge, sizing, duct connections, and thermostat wiring account for the overwhelming majority of post-install problems, and all four are the installing contractor’s responsibility. The two things that protect you are a written commissioning sheet from install day and a written record of every symptom you notice afterward. If either is missing, ask for it now. If the installer can’t provide it, that’s your signal to bring in a fresh set of eyes. A brand-new system deserves a proper install, and getting it corrected early is almost always cheaper than living with it.
If you’re in Cape Coral and something on a new install doesn’t feel right, we can help. We work on whatever brand you have – Goodman, Rheem, York, Daikin, and the rest – and our job is to tell you what’s actually going on, not to sell you a replacement. Call (855) 595-4793 for a free estimate. We answer 24/7. Fast dispatch from 7am to 7pm, Sunday through Friday. Closed Saturday.
Written by the team at Linden AC Repair.